How can we help?
Most reports trace back to one of the causes below. Work down the list and stop when spoofing works.
Spoofing isn't working on a site
These are ordered from most to least common. You likely won't need to reach the end.
GeoSpoof also runs on Chrome, Edge, Brave, and Safari. The steps below are written for Firefox, where these conflicts are most common — on other browsers, apply the equivalent settings.
Last updated: July 2026
Refresh the tab, or reopen it
GeoSpoof only takes effect on pages loaded after it's enabled. Any tab that was already open when you installed, updated, or re-enabled GeoSpoof won't be spoofed until it reloads. Refresh the tab you're testing — if that doesn't help, close it and open it again.
Update to the latest version
Many issues are already fixed in a newer release. In the popup, open Settings (the gear icon in the header) to see your version, then compare it to the latest release below and update through your browser's extension manager if you're behind.
View the latest release on GitHubConfirm GeoSpoof is running on the site
GeoSpoof's toolbar icon shows whether it's active on the current tab. If it isn't active, nothing gets spoofed — most often because of the site scope set in the Filters tab.

Active on this tab 
Not running on this tab - Allowlist mode: only listed sites are spoofed — add the site you're testing.
- Denylist mode: make sure the site isn't on the list.
- Or switch to "All" to spoof everywhere.
Reset the site's location permission
If a test reports "Geolocation: Denied", Firefox is blocking the request — usually because the prompt was once denied with "Remember this decision" checked.

What a blocked location request looks like on a fingerprint test. - Click the lock icon in the address bar.
- Clear any remembered Block for location, then reload the page.
- In Firefox settings, confirm "Block new requests asking to access your location" is off.
- If GeoSpoof's "Preserve location prompts" toggle is on and you denied the prompt, either allow it or turn the toggle off so GeoSpoof answers directly.
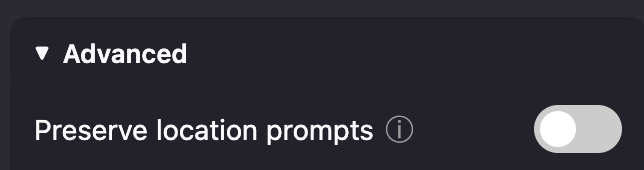
GeoSpoof popup with "Preserve location prompts" turned off. Restart your browser
Some browser APIs are set up at startup, so a recent install, update, or settings change may not take effect until you fully close and reopen your browser.
Best diagnostic
Test in a fresh Firefox profile
A clean profile isolates GeoSpoof from your existing setup.
- Open
about:profilesand create a new profile. - Launch it, install GeoSpoof, and test the same site again.
If spoofing works in the clean profile, GeoSpoof itself is fine — something in your normal profile is interfering, almost always a privacy tool or an
about:configchange. The next two steps cover those.- Open
Disable conflicting privacy tools
Hardening tools change many of the same browser APIs as GeoSpoof and can override it. Temporarily disable any you use, then retry: Arkenfox, Betterfox, LibreWolf, CanvasBlocker, JShelter, Chameleon, Trace, or any fingerprint randomizer.
Check
about:config(advanced)If you've hardened Firefox, confirm these preferences are disabled, then restart and retry. Strict Enhanced Tracking Protection is usually fine and doesn't need changing.
privacy.resistFingerprintingprivacy.fingerprintingProtectionprivacy.fingerprintingProtection.pbmode
Confirm on a second fingerprint test
Tests measure different APIs and some are simply buggy. Before assuming GeoSpoof is at fault, verify the result on another reputable test — we recommend the Region section of arkenfox's TZP.
Open the TZP test
Other common questions
How it works
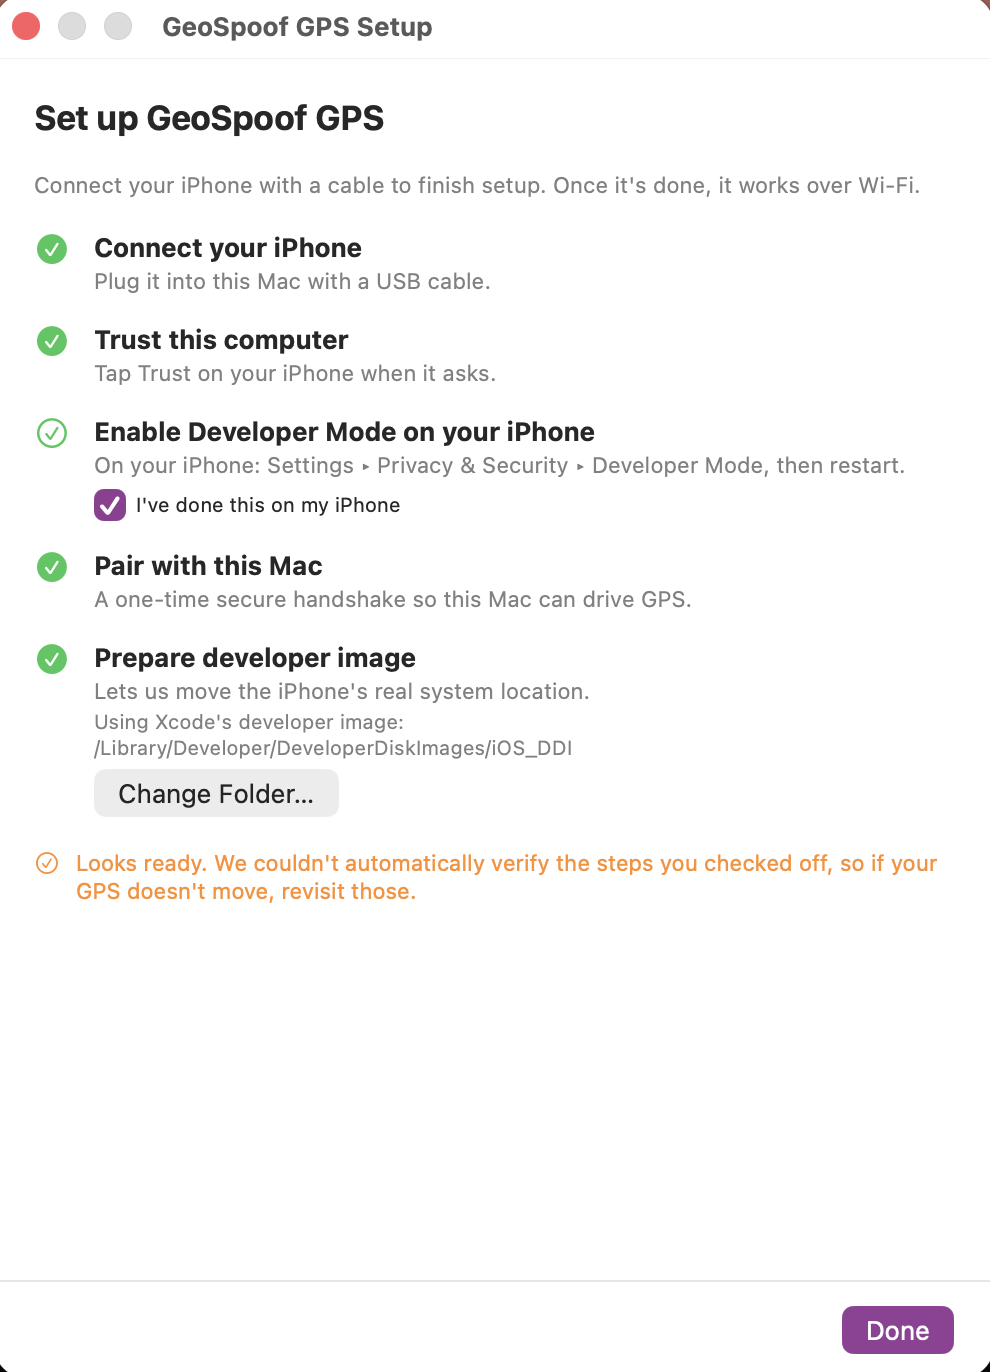
Open the menu-bar icon and choose “Set Up…”. The wizard checks each step off as you go. Connect your iPhone with a cable to finish setup. After that, your Mac can set the GPS over Wi-Fi or a hotspot, as long as both devices stay connected to each other.
What you'll need
- macOS 13 (Ventura) or later.
- The GeoSpoof app for iPhone with GeoSpoof Pro. The app is your control surface that sets the location, and moving the device's real GPS is a Pro feature.
- An iPhone with Developer Mode enabled, connected by USB cable for first-time setup. After that it needs to reach your Mac over a cable, the same Wi-Fi network, or a hotspot whenever you set or change a location.
- Xcode, Apple's free developer app from the Mac App Store. It's a big download, so set aside about 15 GB of free space. (You don't build anything; the setup steps below explain how it's used.)
Install the app
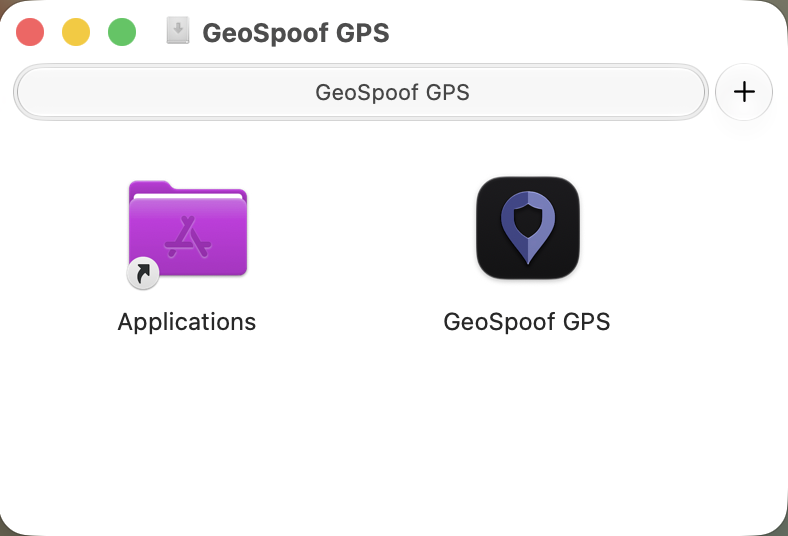
Open the DMG, drag GeoSpoof GPS into Applications, then launch it. It lives in your menu bar (no Dock icon, no window) and opens the setup wizard the first time it runs.
Allow Local Network access
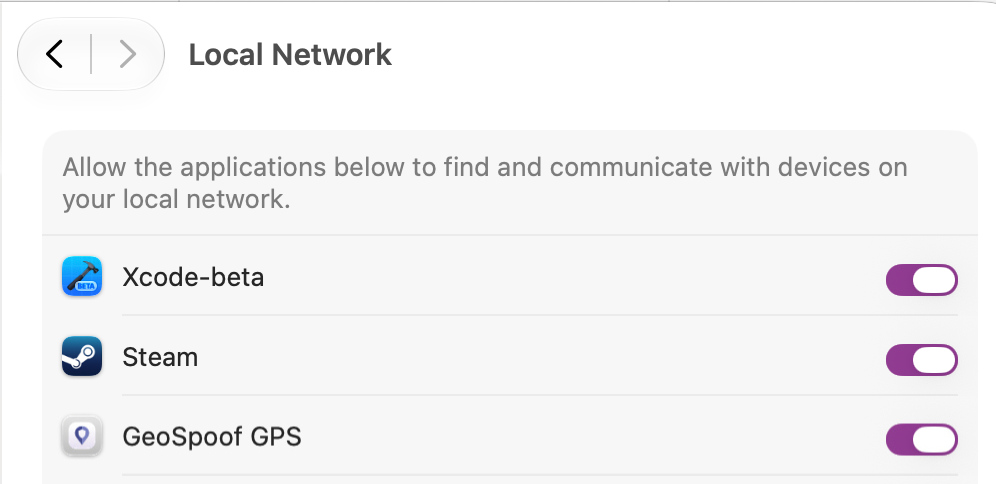
On first launch, macOS asks for Local Network access. Click Allow so GeoSpoof GPS can find and talk to your iPhone. Without it, the app can't see your phone.
- Missed the prompt? Turn it on under System Settings ▸ Privacy & Security ▸ Local Network ▸ GeoSpoof GPS.
- A stuck “No device found” is the usual sign this permission is off.
Install Xcode
GeoSpoof GPS needs Apple's Developer Disk Image, and it ships inside Xcode. Kick off this download first — it's large (several GB), so let it install in the background while you do the quick iPhone steps below.
- Install Xcode (free) from the Mac App Store and launch it once.
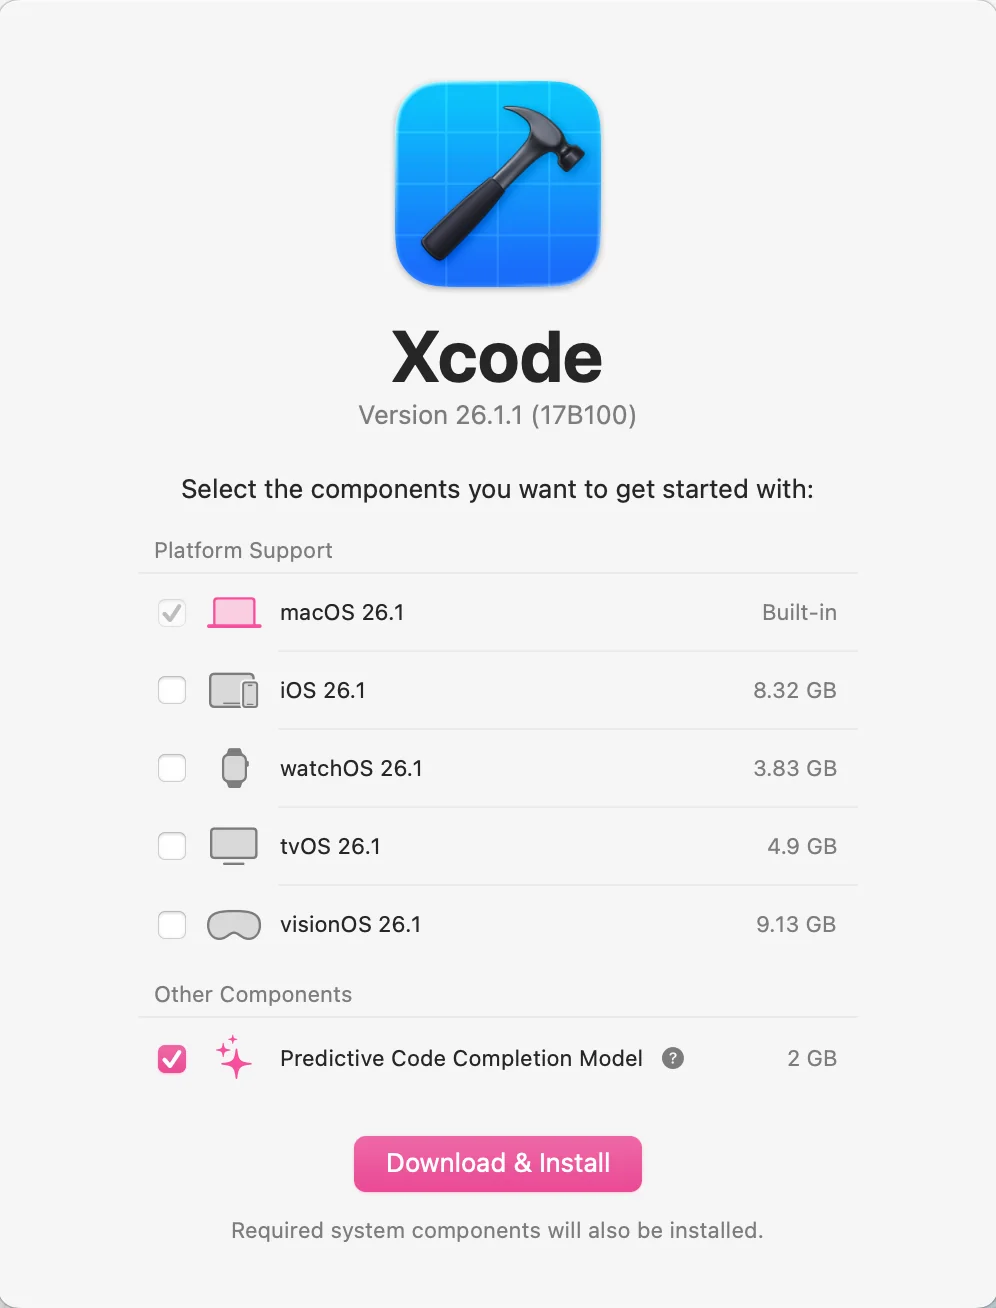
- On first launch it shows a “Select platforms” screen. Check macOS and leave the rest (including iOS) unchecked, then continue — you don't need the iOS SDK or Simulator, the developer image is part of Xcode's base setup either way.
- Let it finish “Installing components,” then quit Xcode. No project, no build, nothing to compile, and no paid Apple Developer account.
- Already have a developer image? Point GeoSpoof GPS at that folder instead and skip the Xcode download entirely.
Connect your iPhone
Plug your iPhone into your Mac and unlock it. Use a data-capable cable, since some are charge-only. If it doesn't appear, try another cable or port.
Trust this computer
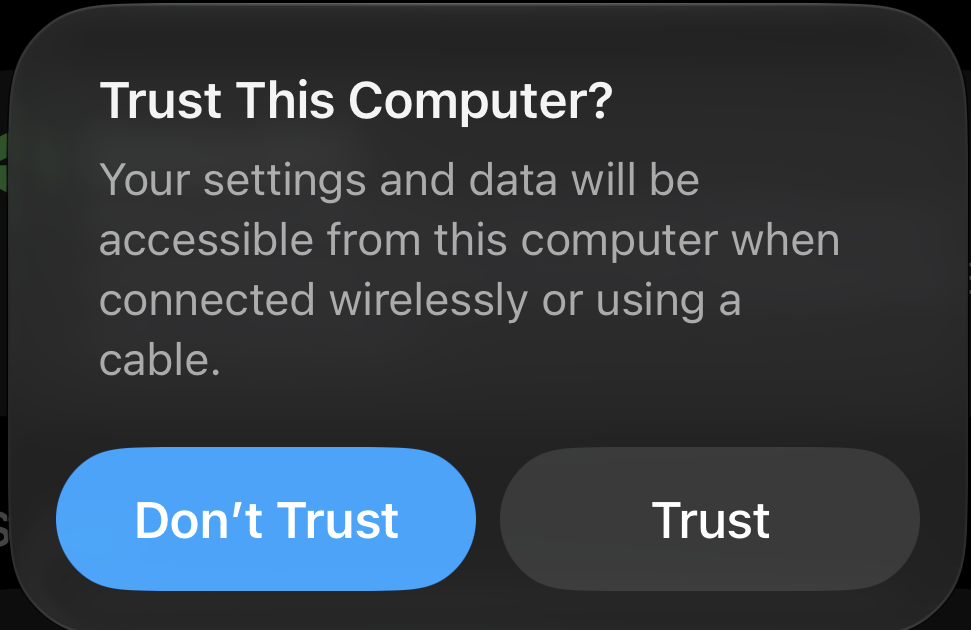
When your iPhone asks whether to trust this computer, tap Trust and enter your passcode. That lets your Mac and phone talk to each other.
- No prompt? Keep the phone unlocked, then unplug and replug the cable. The alert only shows while the screen is unlocked.
- Still nothing? Lock and unlock the phone (or restart it) and reconnect.
- Last resort only: Settings ▸ General ▸ Transfer or Reset iPhone ▸ Reset ▸ Reset Location & Privacy, then reconnect and tap Trust.
Enable Developer Mode
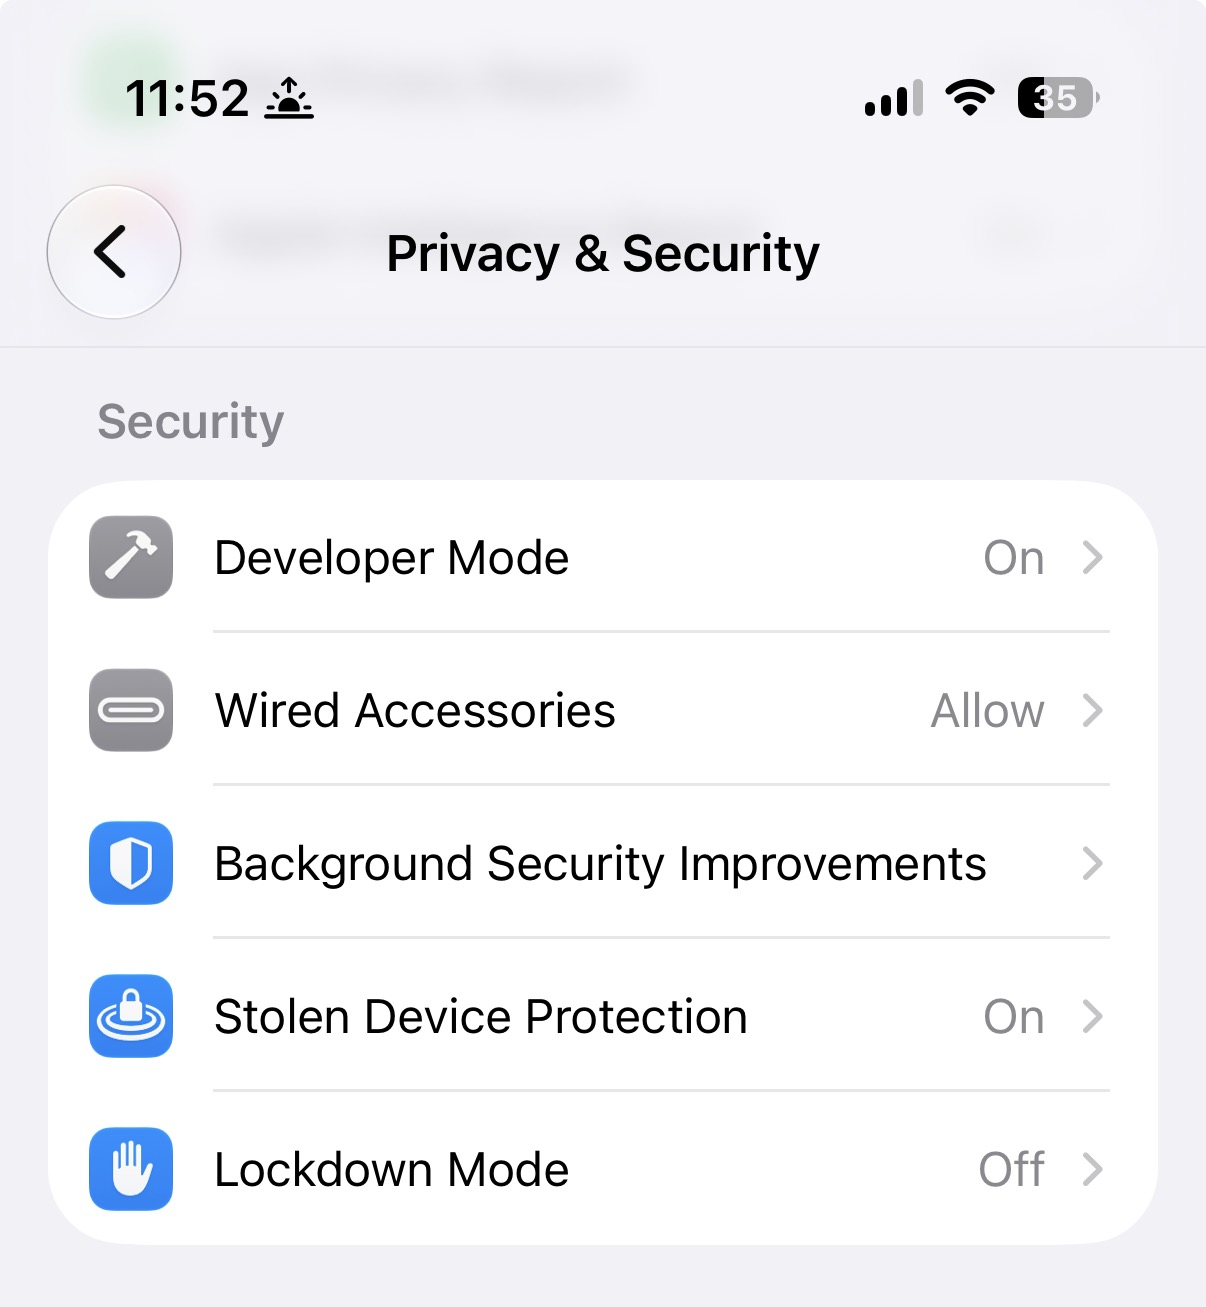
On your iPhone, open Settings ▸ Privacy & Security ▸ Developer Mode, switch it on, and restart when prompted. It only appears after the phone has connected to your Mac at least once.
Pair with this Mac
In the setup window, click Pair. This one-time secure handshake lets your Mac drive the iPhone's GPS. Keep the phone unlocked and connected while it runs.
Prepare the developer image
Requires Xcode installed (above). With your iPhone connected and unlocked, click Prepare. GeoSpoof GPS personalizes Apple's Developer Disk Image (DDI) to your device and mounts it — the piece that lets an app set your real GPS location. It's Apple-signed and done for you; there's nothing to configure.
Image not found? If Prepare says it can't find the developer image, Xcode's setup may not have finished laying it down. Open Terminal, run this, then click Prepare again:
xcrun devicectl manage ddis updatePick a location in GeoSpoof
Set your location as usual in GeoSpoof. Your iPhone's system-level GPS follows it and stays aligned as long as it can reach your Mac over the cable, the same Wi-Fi network, or a hotspot.
- You can unplug the cable, but the connection has to stay. The Mac app is what sets the GPS.
- Going out without your Mac? Turn off Developer Mode while the location is active and it stays put. To change it later, restart your iPhone and connect it again.
Still need help?
Send us an email and we'll get back to you within a day or two.
Include these so we can help faster:
- Firefox version
- Operating system
- GeoSpoof version
- VPN provider (if applicable)
- The fingerprint test site you're using
- A screenshot of the result
- Whether spoofing works in a fresh Firefox profile
You can also report bugs on GitHub.