
Match your iPhone's real GPS to your spoofed location
GeoSpoof GPS is a desktop companion for Mac and Windows that sets your iPhone's system-level location to the place you pick in GeoSpoof.
macOS 13 (Ventura) or later. Apple silicon or Intel.
Before you download
- Requires Pro in the iOS app from $1.99/mo Get GeoSpoof for iOS
- Not for AR games: GeoSpoof GPS is designed purely for privacy, web browsing, and development. It is not compatible with, nor designed for, AR mobile games like Pokémon GO.
- Requires a computer How the connection works


What iPhone users say
★★★★★★★★★★4.4 App Store“Works like a charm. Clear and simple setup instructions. … Very well done. Found this through Reddit :)”
jacobpantoja
“Really impressed with GeoSpoof. It does what it promises, works reliably, and has a clean, well-thought-out design. … You can tell the developer genuinely cares about the app and its users.”
HParviZ
“Works on every website updating my location plus the app is super easy to use!”
jimmyrustler67
Read more reviews onApp Store
What GeoSpoof GPS adds
The spoof in your browser covers websites. GeoSpoof GPS takes the same location to the rest of your iPhone.
| Feature | Browser | With GPS |
|---|---|---|
| Location spoofing on every site | ||
| Your iPhone's real system GPS | ||
| Maps, Weather and any app that asks | ||
| Follow GPX routes at a real pace | ||
| Several iPhones and iPads from one computer | ||
| Keeps the location after you leave your computer* |
The location stays fixed while it holds.
How it works
One consistent location across your browser and your phone, driven entirely from the GeoSpoof app you already use.
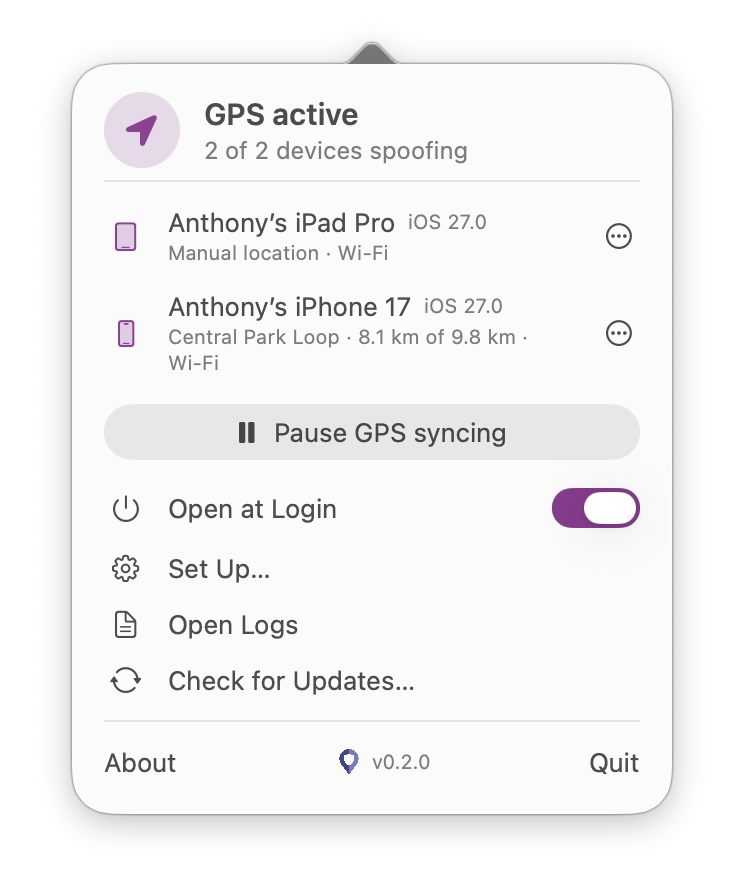
GeoSpoof GPS has no window. It lives in your menu bar — click the pin near the clock to open the panel.
You pick, it follows
Choose a location in the GeoSpoof app the way you always do. That choice is the single source of truth, and GeoSpoof GPS on your computer mirrors it to your iPhone — so the browser spoof and the device's real GPS finally tell the same story.
Your computer moves the GPS
Over a secure, one-time pairing, the desktop app uses Apple's own developer location simulation to set your iPhone's system-level location. No jailbreak, nothing to build — the same mechanism developers already use in Xcode.
Holds steady, reverts clean
The app keeps your location locked in and switches instantly when you pick somewhere new. Pause syncing or quit, and your iPhone snaps back to its real GPS right away — no spoof left behind.
Yours alone
It all happens directly between your computer and your iPhone, so your location never touches our servers. Pro is verified with Apple-signed receipts, and the Mac build is notarized by Apple and signature-checked on every update.
macOS 13 (Ventura) or later. Apple silicon or Intel.
The connection to your computer
Each iPhone or iPad pairs once over a USB cable, and you can pair more than one. After that, your computer keeps the location in place, so the two need to stay connected while it's spoofed. Any of these will work:
USB cable
The most reliable option, and the one first-time setup uses. Use a cable that supports data, and keep your phone unlocked.
The same Wi-Fi network
After the first pairing, your computer can find your phone over the local network, with no cable needed. Both devices have to be on the same network.
A hotspot
If there's no Wi-Fi network you can both join, turn on your iPhone's Personal Hotspot and connect your computer to it. Sharing your computer's connection with the phone works too.
Going out without your computer
A location can stay in place after the connection ends. While your spoofed location is active, turn off Developer Mode on your iPhone (Settings ▸ Privacy & Security ▸ Developer Mode). The location holds from that point on, including once you've left your computer behind.
The trade-off is that the location is now fixed. To pick a different one, turn Developer Mode back on, restart your iPhone, and set the new location with your computer nearby.
Downloads
The download is free either way. Device-level GPS is a Pro feature, and Pro is bought in the GeoSpoof app on your iPhone, which is also where you pick the location. Get GeoSpoof for iOS
macOS
macOS 13 (Ventura) or later. Apple silicon or Intel.
Download for MacWindows
Windows 10 or later, 64-bit.
Download for Windows
Finding the latest version…
Your IP address is the one signal GeoSpoof can't change. Only a VPN can.
- No-logs, independently audited
- Swiss, open-source
Up to 70% off30-day guarantee
Still stuck? Get help